


Blood Bowl Khemri - step by sandy step painting guide
Updated: Aug 2
Recently I have been handed 7 BB teams to paint up for a regular customer who has become a BB player and after painting the first - Beastmen - I thought I might do a couple of painting guides on some of the rest. First up is Khemri.

As usual I primed dark but this time mixed some dark brown primer with the black so it would not be quite as cold black a basefor the shadows. Then straight to the airbrush to spray in the bones. These were done in desert yellow, dark sand and then ivory. This results in quite a whitish bone but as i was going to wash them over later this is a good plan.

The blue is going to be bluer and less turquoise than the usual box scheme as I have the Dwarf team yet to paint and dont want to have two teams with similar colours if possible, so started with dark prussian blue which is brush painted as I dont want to deal with overspray on the bone.

This is then lightened up with sky blue in stages. On the big boys overspray was not a problem and on the smaller ones I use Panzer Putty to pop in a quickly removable block. You can also use cling film if not in a hurry but as a commission painter not in the top tier I am always in a hurry!

The final layer is almost white and is there for drama rather than anything like reality.

The rear view. At this point everything looks a bit washed out but that is not how it will end up looking and if it does we can always use glazes or thinned contrast paints to get some colour back.
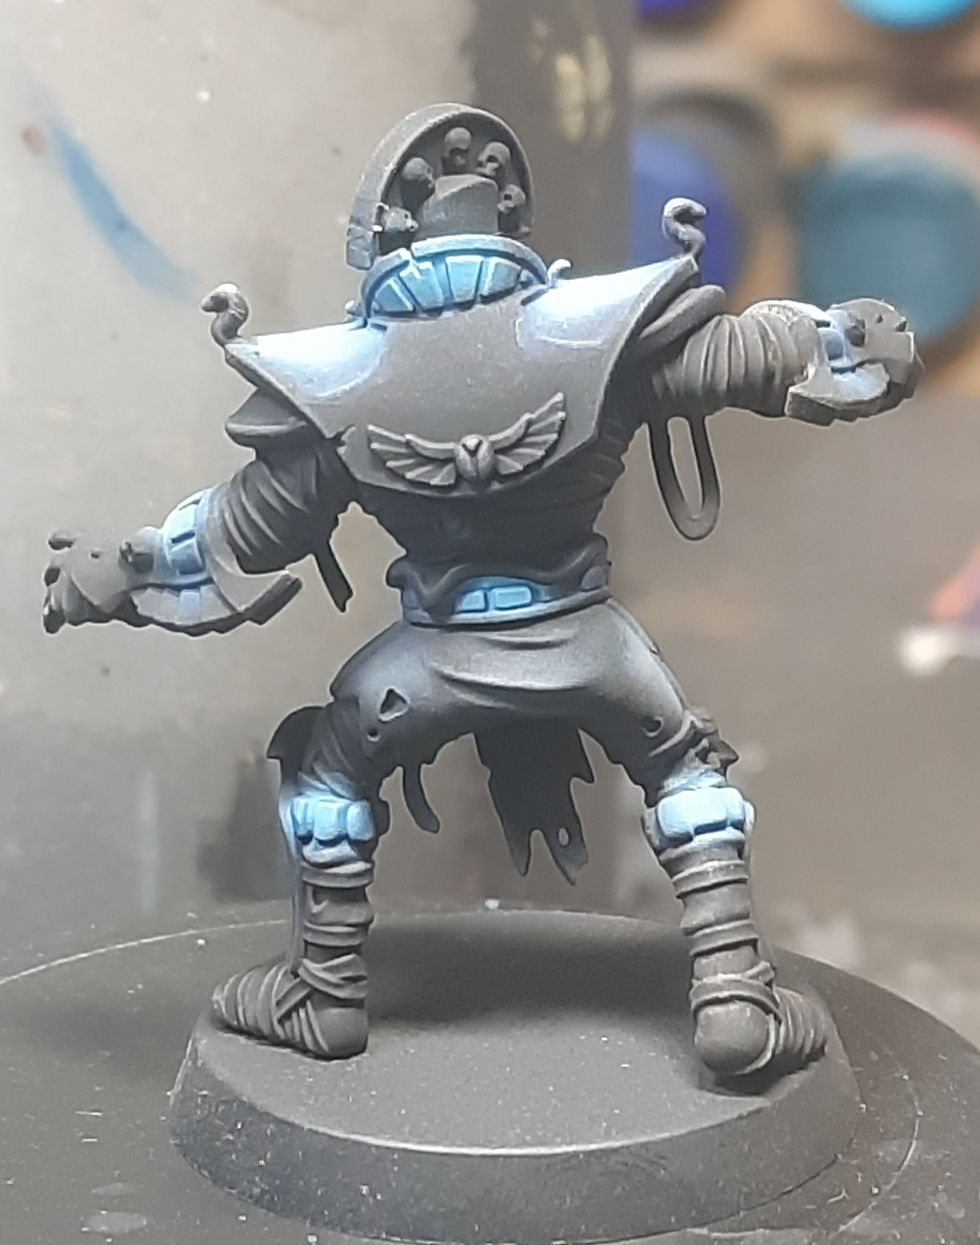
Back to the brushes and the bandages were painted with a dark browny green, I used Vallejo english uniform mixed with some black but it doesnt matter really as long as its a dullish base with just a muted colour. This was the edge highlighted with a light khaki and in some places an even lighter sand. This can be quite rough as it will give a clothlike effect.

Belts and dangly leather bits were then painted. I always use a Vallejo model colour called German Camo Dark Brown as a base for any dark browns but again its whatever dark brown you have. This was then edge highlighted with a khaki drab and some scratchy bits added. If you were taking your time on these you could go to town on this as i have done on the 75mm mini below but as I have mentioned at my price point for 28mm that is not possible.

75mm Kimera mini leatherwork

A few extra scratches and highlights in a lighter khaki drill are worth the time though.

At this point red panels were painted in with burnt red as a base then AK flat red and AK old rose edge highlights. Blue panels had very light edge highlights added as well.

Metallics time. I tend to use AK Burnt Tin as a base for any bronze or gold as onece on it is a solid shadow colour

To this I added copper as i wanted a bronzy rather than a full gold effect. In the end it went a bit goldy probably or at least a very shiny bronze. In retrospect I should perhaps have done some parts very much broze style and others in gold.

Gold was added to the mixture for highlights as can be seen below and I think perhaps a bit too much.

Final highlights added silver to the miv and this can be seen best in the bits dangling from the belts in the picture below contrasted with the picture above.

The exact same process happened with the Blitzers and the Throwers as can be seen below.

Now for two fun parts as shown in the picture below. Firstly everything was sprayed gloss varnish and allowed to dry then all the bone areas were washed with a thinned down contrast colour called Bag of bones by Vallejo. I have contrast type paints by both Vallejo and Army Painter and switch and mix both as needed. You can see on the lower leg the effect which is really nice. The varnished surface seems to help the contrast paint slide into the cracks.
The second job is to paint in the dark lines between the panels to add contrast. You might be able to do this with a steady hand and time but I instead do it the easy way which involves making an oil wash of cheap black and blue oils using odourless thinners and then just letting capilliary action do the work. Once dry it can be cleaned up in seconds with clean thinner. I have a retired, but still quite pointy size 2, I use for oil wash work as it can deliver the wash accurately enough but with enough in the belly to let it run along the recesses.

Once dry and cleaned up I sprayed matt varnish over them again and used dark sand to highlight all the bones leaving the wash in the recesses as can be seen in the eye sockets and legs below. At this point we are pretty much finished and the final stage before basing is the 'tarting up' stage when I take each mini, one at a time rather than by batch, and fix any obvious errors of overpainting, painting the sandals, the balls etc. At this point I realised I had missed the light grey stripes on the shorts and went back to fix those with basalt grey then light grey.

Bases were PVA glued and dipped in Sharp sand which I buy in bags from builders merchants with a bag lasting years. Once dry everything is then matt varnished again. This tones down the gold/bronze and stops the sand from falling off when painted. I paint all my bases using a 5 litre brown emulsion paint I bought at Wilkos (before it closed down) and this has lasted years. This is then dry brushed desert yellow and dark sand before painting the rims black as god intended.


Painting these and the other teams almost has me wanting to play BB again but sadly I have had to add that the pile of games that my brain no longer allows me play well enough to enjoy!
Comments